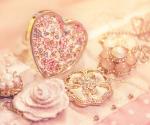
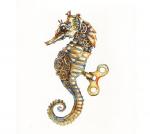
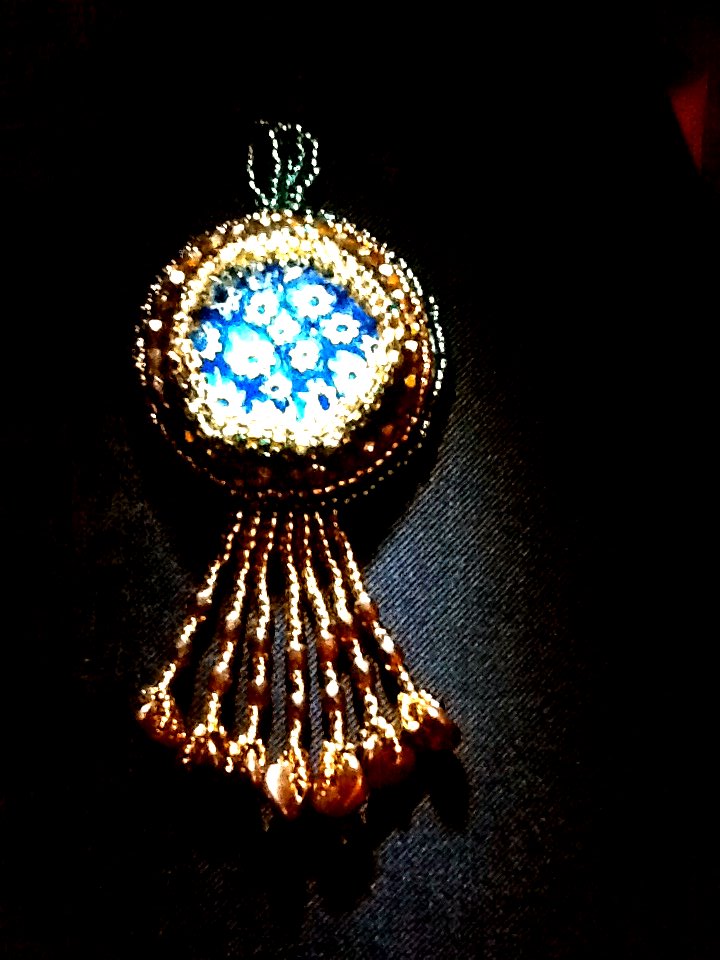
We will learn from the example of a dichroic glass cabochon
![](http://craft-craft.net/wp-content/uploads/2011/12/craft-craft-13482596898a3.jpg)
This would require this:
![](http://craft-craft.net/wp-content/uploads/2011/12/craft-craft-2586a33131e77.jpg)
Glue
Bikonusy 3 mm
Beads number 11
Beads number 15
Delica number 11
Cabochon
Oval or teardrop-shaped beads
Threads
Needle
Felt or leather
Cabochon glue the piece of felt and begin to sew in a row in a circle
![](http://craft-craft.net/wp-content/uploads/2011/12/craft-craft-3618cdabe6afc.jpg)
![](http://craft-craft.net/wp-content/uploads/2011/12/craft-craft-4217ecaa0ed7c.jpg)
![](http://craft-craft.net/wp-content/uploads/2011/12/craft-craft-59b318f351646.jpg)
![](http://craft-craft.net/wp-content/uploads/2011/12/craft-craft-64e8b24b9358e.jpg)
![](http://craft-craft.net/wp-content/uploads/2011/12/craft-craft-7c2f736a1a1f4.jpg)
![](http://craft-craft.net/wp-content/uploads/2011/12/craft-craft-8be0aa3afe46d.jpg)
![](http://craft-craft.net/wp-content/uploads/2011/12/craft-craft-96bba9ab5014a.jpg)
![](http://craft-craft.net/wp-content/uploads/2011/12/craft-craft-10610c92c9f7f6.jpg)
![](http://craft-craft.net/wp-content/uploads/2011/12/craft-craft-11b946df5ec9a2.jpg)
![](http://craft-craft.net/wp-content/uploads/2011/12/craft-craft-127abe1f939c09.jpg)
![](http://craft-craft.net/wp-content/uploads/2011/12/craft-craft-13c30bdbc8ecfd.jpg)
Next, begin to braid cabochon round way brick
![](http://craft-craft.net/wp-content/uploads/2011/12/craft-craft-14a78fef85b1a5.jpg)
![](http://craft-craft.net/wp-content/uploads/2011/12/craft-craft-152eedfa0fc2f2.jpg)
![](http://craft-craft.net/wp-content/uploads/2011/12/craft-craft-169d90db2e9df2.jpg)
![](http://craft-craft.net/wp-content/uploads/2011/12/craft-craft-187000a360276a.jpg)
At the end of the braid using beads number 15 to get the screed and to cabochon not dropped out of the rim.
![](http://craft-craft.net/wp-content/uploads/2011/12/craft-craft-19f901d5fa60f0.jpg)
![](http://craft-craft.net/wp-content/uploads/2011/12/craft-craft-206ca96512de30.jpg)
Cut away excess skin or felt as close to the stitches of embroidery
![](http://craft-craft.net/wp-content/uploads/2011/12/craft-craft-21934d5f61e5c4.jpg)
![](http://craft-craft.net/wp-content/uploads/2011/12/craft-craft-22398d4d3a3da9.jpg)
![](http://craft-craft.net/wp-content/uploads/2011/12/craft-craft-232b05ed81d13e.jpg)
Derive a needle and thread up
![](http://craft-craft.net/wp-content/uploads/2011/12/craft-craft-2420a27c9fa2bd.jpg)
Glue another layer of felt or leather, the thickness of the layer of felt coincided with the diameter of beads, and cut it.
![](http://craft-craft.net/wp-content/uploads/2011/12/craft-craft-25953c4da2c616.jpg)
Begin to embroider the side felt, to close it. Beads should be placed perpendicular to the cabochon (holes to the side, but not up!)
![](http://craft-craft.net/wp-content/uploads/2011/12/craft-craft-268be56a834d72.jpg)
![](http://craft-craft.net/wp-content/uploads/2011/12/craft-craft-27375804df9e93.jpg)
![](http://craft-craft.net/wp-content/uploads/2011/12/craft-craft-2822b78b3e3196.jpg)
![](http://craft-craft.net/wp-content/uploads/2011/12/craft-craft-298f31ade7780a.jpg)
![](http://craft-craft.net/wp-content/uploads/2011/12/craft-craft-3022abc45a6e4a.jpg)
![](http://craft-craft.net/wp-content/uploads/2011/12/craft-craft-313d0dd58f8658.jpg)
![](http://craft-craft.net/wp-content/uploads/2011/12/craft-craft-3289bd4a0d8cb7.jpg)
![](http://craft-craft.net/wp-content/uploads/2011/12/craft-craft-33f238afd348aa.jpg)
Glue another layer of leather or felt, and circumcised him as close to the edges of the embroidery. Repeat the previous steps and get step-embroidery.
![](http://craft-craft.net/wp-content/uploads/2011/12/craft-craft-3406ce3e67b72a.jpg)
![](http://craft-craft.net/wp-content/uploads/2011/12/craft-craft-3509b58cc7812a.jpg)
![](http://craft-craft.net/wp-content/uploads/2011/12/craft-craft-360027a59589d4.jpg)
![](http://craft-craft.net/wp-content/uploads/2011/12/craft-craft-3727980a468b02.jpg)
![](http://craft-craft.net/wp-content/uploads/2011/12/craft-craft-382d06eac414ac.jpg)
![](http://craft-craft.net/wp-content/uploads/2011/12/craft-craft-39d539b1f4182a.jpg)
Now sew the fringe.
![](http://craft-craft.net/wp-content/uploads/2011/12/craft-craft-40379c4f242701.jpg)
![](http://craft-craft.net/wp-content/uploads/2011/12/craft-craft-4180c455ac20ec.jpg)
![](http://craft-craft.net/wp-content/uploads/2011/12/craft-craft-4209bdc520237d.jpg)
![](http://craft-craft.net/wp-content/uploads/2011/12/craft-craft-430ab75d3c5d48.jpg)
Fringe only do the bottom, the rest of the perimeter decorate bikonusami.
![](http://craft-craft.net/wp-content/uploads/2011/12/craft-craft-448e8b889aba70.jpg)
![](http://craft-craft.net/wp-content/uploads/2011/12/craft-craft-456d11cc829bfc.jpg)
At the top of the pendant are doing a loop for hanging.
![](http://craft-craft.net/wp-content/uploads/2011/12/craft-craft-463f6209ed8c33.jpg)
![](http://craft-craft.net/wp-content/uploads/2011/12/craft-craft-47829cfa563020.jpg)
End of thread hiding, threading it through a few beads
![](http://craft-craft.net/wp-content/uploads/2011/12/craft-craft-4890e340cdafa7.jpg)
Done!
![](http://craft-craft.net/wp-content/uploads/2011/12/craft-craft-13482596898a3.jpg)
Photo: biser.info
Visit link →